How to Create a New Environment
An environment is automatically installed in each generated notebook server. But in case you want to initialize a new custom Python environment, follow the indications in this page.
Why create a new environment
AI Platform offers IDEs with pre-configured environments that you can choose from when running computations in a notebook. The pre-configured environments are built on Conda and include a wide range of commonly used Python packages to support typical data science and machine learning workflows.
If you need to use packages that are not available in the pre-configured environments, you can install them on-demand from within a notebook cell or in IDE's terminal. But this has to be done each time a compute is restarted or the notebook is culled.
In this tutorial, we'll go through how to create a a new virtual environment on notebooks and make it available as kernel even after notebook restart.
View packages installed in an environment
To view the packages installed in a virtual environment, do the following:
-
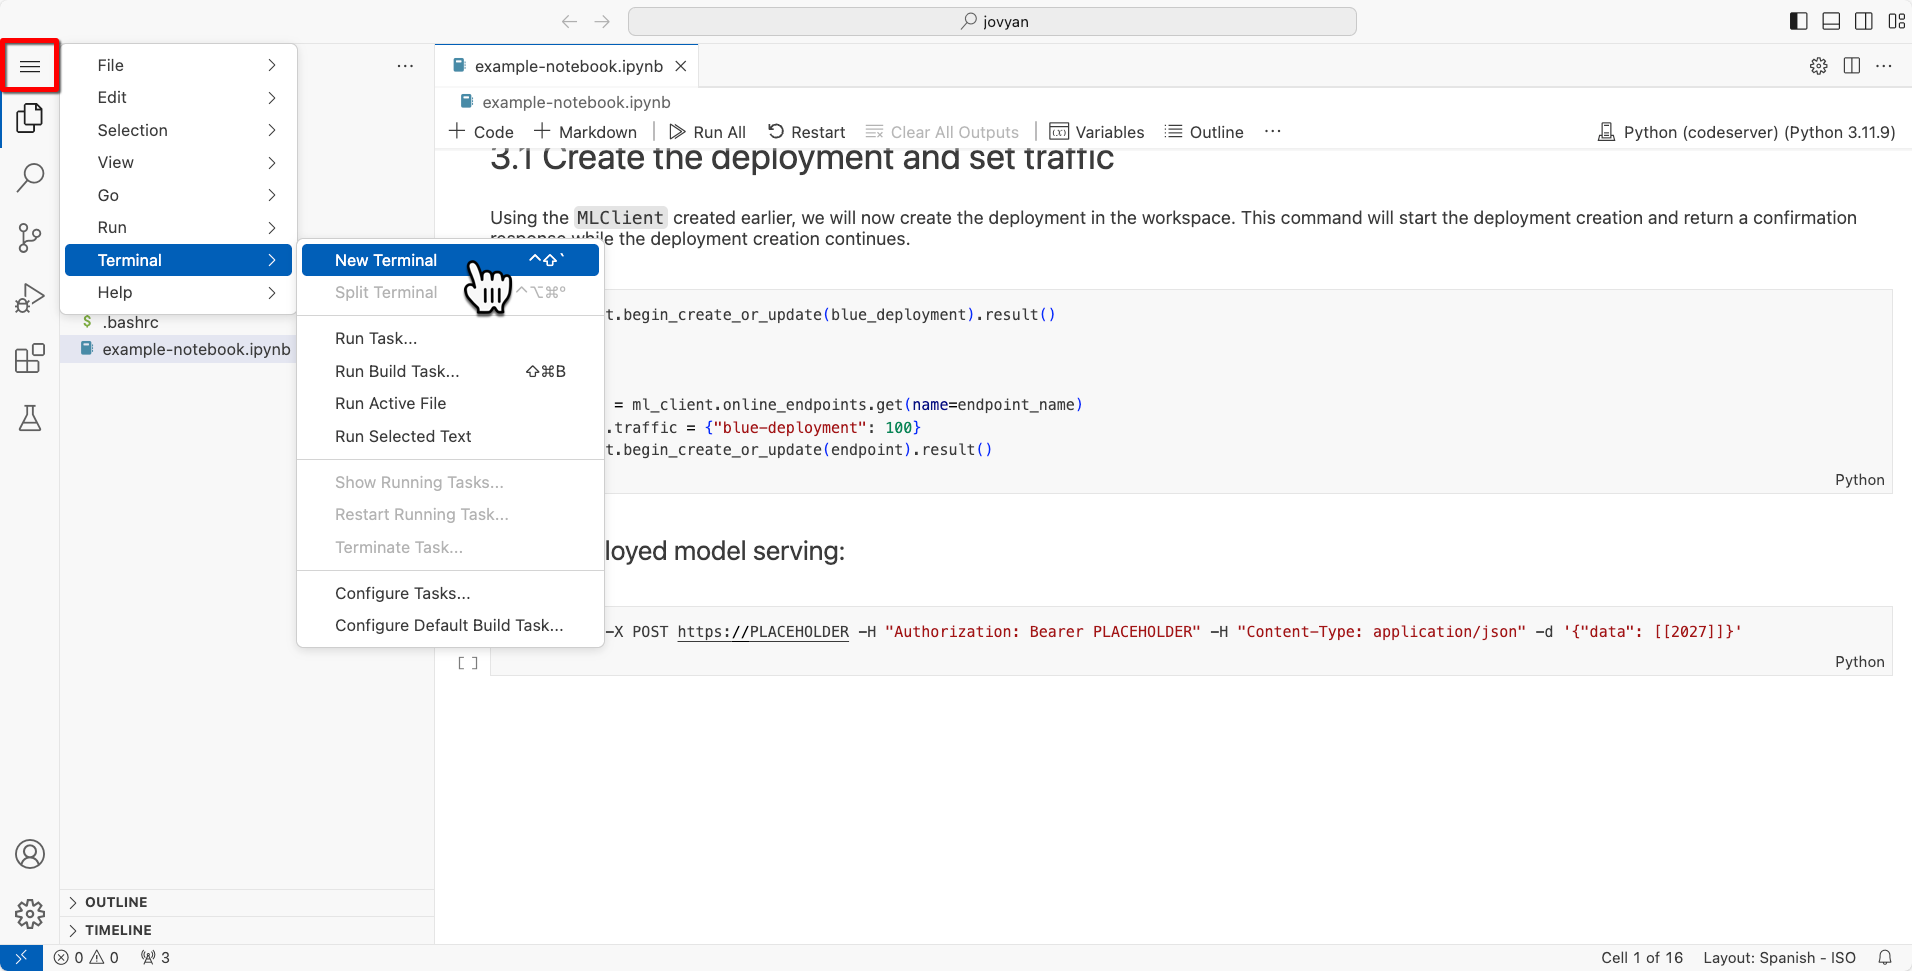
From the web-based IDE you generated, open a terminal window:
-
Click the hamburger icon con the top-left.
-
Select Terminal > New Terminal.
 Open terminal in IDE
-
-
From the terminal, run the following command:
pip freeze -
Check the output for a complete list of installed packages.
Set up environment
-
From the terminal, run the following command to see the list of existing Conda environments.
conda env list -
Create a new conda environment:
conda create --prefix <SUBDIRECTORY> python=<PYTHON_VERSION>- SUBDIRECTORY = directory that will be created in
/home/jovyan - PYTHON_VERSION = specifies the interpreter version that will be used to run your code
Further ResourcesWe use
--prefix <SUBDIRECTORY>instead ofconda create -n <NAME> python=<PYTHON_VERSION>to ensure the environment is created in a persistent location. This is necessary because notebook culling can delete environments stored in the default directory.For details, go to:
- SUBDIRECTORY = directory that will be created in
-
Activate the environment:
conda activate /home/jovyan/<SUBDIRECTORY> -
You can now install additional packages using
conda,pip, arequirements.txtfile, or anenvironment.ymlfile.For example:
pip install pmdarima
Set kernel
-
To make the environment available as a kernel, you need to install
ipykernel:pip install ipykernel -
Next, run
ipykernel:
- Shell
- Python
From the terminal:
python -m ipykernel install --user --name <NAME> --display-name "<DISPLAY_NAME>"
Within the notebook:
!python3 -m ipykernel install --user --name <NAME> --display-name "<DISPLAY_NAME>"
- NAME = sets the internal identifier for the kernel (used in Jupyter config)
- DISPLAY_NAME = sets the human-friendly name you see in JupyterLab/VS Code when selecting kernels; use within quotation marks
This will install the kernelspec in /home/jovyan/.local/share/jupyter/kernels/<NAME>.
For details, go to:
-
Close and reconnect your notebook. Your environment should now appear as an available kernel.
- Click Select Kernel or currently selected kernel.
- Click Select Another Kernel if the recently created kernel is not visible.
 Select kernel
- Click Jupyter Kernel.
- Select the kernal.
 Kernel is now available